Tips for Safe and Effective Prescribed Burning
Well Done: Tips for Safe and Effective Prescribed Burning
In my experience, there are two universal truths when it comes to performing a prescribed burn: 1) if you do it long enough, you will have to call in support from the local volunteer fire department at some point, and 2) the fire department will get their trucks stuck in the mud while trying to contain your escaped fire, complicating the situation.
With any luck, that first time you lose a fire will hopefully be the last. But in the absence of good luck, knowledge, and experience (namely, learning from past mistakes) are your best allies in doing safe and effective prescribed burns. This article is intended to share with you some of the most helpful tips and strategies that I have learned over the years of burning for landowners.
Prescribed burning, or “controlled” burning as it is sometimes called, can be an extremely useful management tool for property owners in Iowa. Fire has been a natural force for thousands of years – Native Americans routinely torched the landscape for safety and visibility, to make travel easier, to clear the land for agriculture or foraging, to rejuvenate vegetation for bison (and hence make better hunting opportunities), and for many other reasons.
These days, modern landowners might use fire for a variety of different reasons that still relate to habitat management. For instance, they might use fire to keep unwanted trees from taking over prairie, or to clear the old duff and temporarily create bare ground for pheasant and quail chicks to move more easily. They might wish to increase flowering forbs which attract more insects, or to comply with Conservation Reserve Program (CRP) requirements. In oak woodlands and old timber pastures, more landowners are experimenting with fire to control multiflora rose and promote natural oak regeneration.
Clearly defining your goals and learning about fire should be the chief task as you begin to formulate your plan. Needless to say, fire is risky, and in many cases it may not even be the best management tool to accomplish your goals. Speak with qualified experts and get onsite advice to help determine if fire is the right choice for your particular situation. Wildlife biologists, NRCS technicians, foresters, county conservation staff, or private habitat consultants can all be good sources of information.
Furthermore, keep in mind that doing prescribed burning in the modern world is highly technical and requires extensive knowledge on fire and smoke behavior. As such, this article cannot possibly cover all the bases necessary for you to master it on your own. Beginning landowners are encouraged to attend formal trainings and spend time working alongside professionals to gain experience before attempting it on their own properties.
Setting the Stage
Once you’ve identified your goals and are confident that prescribed burning is the right tool for the job, the first step in designing the burn is to consider which wind direction is ideal for your particular situation. This will primarily depend on two things: whether there are any homes, livestock, roads, or other features that could be sensitive to heavy smoke, and 2) whether there are any natural firebreaks which may be used to an advantage.
Homes or other features should be far enough away that the smoke will rise above or will be dispersed enough to avoid any potential problems. Keep in mind that certain people, such as individuals with asthma, can be more sensitive to smoke than others. It can be helpful at this stage to knock on the door and discuss things with neighbors to see if there are any concerns.
Many factors can dictate how high and how fast smoke rises and disperses, including atmospheric pressure, topography, wind speed, etc. The National Weather Service publishes weather metrics such as the mixing height, the Haines Index, etc. which can help burn managers predict smoke behavior, but these can be complicated and cumbersome to use. The bottom line is, always choose a wind direction that will avoid problems. If there is nowhere safe for the smoke to go, find an alternative to burning.
The other consideration in choosing a wind direction is using natural firebreaks to your advantage. For instance, imagine you have a burn unit that is surrounded on three sides by flammable grass or thick corn stubble, but to the east is a plowed field or bean stubble. Waiting for a day when you’ve got a steady west wind will save you much effort in controlling that fire, since you’ll have a firm anchor point on the east (downwind) side. Driveways, roads, streams, etc. can all provide similar advantages as natural firebreaks and should be downwind whenever possible.
Site Reconnaissance
In addition to reviewing aerial photos to identify any potential concerns about smoke or an escaped fire, you should walk the area thoroughly to scout things at ground level. Are there overhead power lines that need avoiding, avoiding excess smoke and heat? Wooden utility poles, plastic markers, or fences that need protection from burning? Gullies or deep holes that could break a tie-rod or a person’s ankle? Be sure to identify access points into the property and make a map as you begin to formulate the plan.
Site Preparation
Doing a prescribed burn is a funny thing: it can be exceedingly enjoyable and rewarding, as you lean on your rake and watch the fire do its work; or, it can be incredibly stressful and scary as you furiously race to put out an escaped fire, with hot gases and smoke in your eyes and your skin feeling like it’s about to blister and melt away. The choice is yours: do you want this project to be fun, or stressful?
The difference, I’ve discovered, can be summed up in three simple words: build good firebreaks. If you’re looking for a secret formula to make prescribed burning safe and effective, this is it.
Think about it: wind directions can change unexpectedly. Water tanks can run dry. Pumps can malfunction. ATV tires can go flat. People can twist an ankle. Building good firebreaks eliminates 90% of the issues that could arise when doing a prescribed burn.
Good firebreaks can be defined as a 15-20 foot wide zone around the entire perimeter of the burn unit containing essentially no vegetation, living or dead. This may sound like overkill, but it’s really not that hard to accomplish here in the heart of farm country with all the tractors and implements we have at our disposal. I have seen landowners make effective firebreaks in dense stands of CRP in many different ways.
For most burns that we do on grasslands, we mow the borders with a bat-wing mower, then use a hay rake to sweep aside all the clippings, leaving nothing behind but short stubble. An alternative to this method would be to make multiple passes with the mower to mulch and chop up the residue as small as possible, then use a leaf blower or hand rakes to clear it away. I’ve also seen landowners run a light harrow or drag around the mowed perimeters multiple times in order to scarify the firebreaks and expose mineral soil.
In my experience, disking alone does not create a good firebreak. The prairie grasses are too thick and tough and the roots run too deep to allow the disk to bite in and turn the soil. Unless one makes multiple passes around the field, the result is a bumpy, ankle-twisting mess that doesn’t stop the fire from running across but does attract lots of thistles, ragweed, and foxtail during the next growing season.
Whatever your technique, try to build your firebreaks in the late summer or early fall if possible. Not only is the ground usually drier at this time of year compared to the spring, reducing the chances of you getting stuck, but it also gives plenty of time for the firebreak to “green up” in early spring which will greatly help with controlling your burn.
Someone once said to me, “Prescribed burning really starts the year before you actually do the burn.” Take his advice and mine, and invest your time in building good firebreaks up front, before you light the match. This is the essential difference between a “controlled” burning and firefighting.
Timing the Burn
The timing of the burn can affect which plant & animal species are favored by the burn, versus which are not. For instance, if you have CRP that is overly dense with heavy warm-season grasses and lacking in forbs, then burning before the growing season begins (i.e. either in the fall or winter, up until late March) would be recommended to promote the growth of forbs and early cool-season grasses.
Conversely, if your cover is lacking in heavy winter cover or has a lot of brome, then waiting until there is a little bit of green-up (mid-April to mid-May) would be ideal in order to stress the cool-season plants and favor the later warm-season grasses, assuming they are present.
Another consideration is figuring when you actually have time to do the burning with regards to your personal life. Obviously, burning in the fall is not ideal from the standpoint of leaving winter cover for wildlife; however, in some cases it might be your only option. In these situations, you might consider burning only half of the acres one year, and the other half the next year.
Finally, remember that weather conditions will vary depending on the time of year, and this could impact your burning timeframe. Read the section below for more details on how this applies to the development of your burn plan.
Weather Conditions
Here in Iowa, it seems the only time we get light and variable winds are when the wind is about to change, which usually spells trouble. The best winds for burning heavy grass cover are when they are steady from one direction, which usually means they’re at least 7-8 mph and could be all the way up to 15-20 mph. Anything over 20 mph can be quite scary.
Make sure you check the “Hourly Weather Graph” from the National Weather Service to see that you’ll have steady winds at the appropriate speed. I always get a little leery of doing a burn when I see a change in wind direction within 6 hours or less of when I expect finish. You know how good weather men are.
The most overlooked diagnostic by beginners doing prescribed burning is relative humidity, which characterizes how saturated the air is with moisture. Consequently, it dictates just how hot and crazy a prescribed fire gets, or, how easy it will be to control. When the humidity rises above 70% or so, there’s a lot of moisture in the air and fire tends to almost stand still. Conversely, when the R.H. is below 30%, the air is very dry and the fuels become extremely combustible, and the fire is hard to contain. The degree to which your firebreaks will hold up under pressure is highly correlated to relative humidity.
Lastly, daytime temperature will also influence fire behavior. Beware of weather conditions where the temperatures climb into the 60’s and 70’s with relative humidities less than 40%, which can often happen during the afternoons in Iowa in springtime. Later in the day as the sun gets low, the temperature usually comes back down and R.H. comes back up, making the fire easier to control again.
Equipment Needed
I suppose the safe thing would be to tell you that in order to be truly safe and effective at prescribed burning, you need to have full-body Nomex clothing, hardhats, goggles, fire-resistant leather boots & gloves, radio chest harnesses, emergency fire shelters, fusees, backpack pumps, pulaskis, drip torches, fire rakes, and an ATV with water supply and foam additives.
However, the truth is, I like to keep things simple…and cheap. That’s why I left out the Chinook helicopter with fire retardant.
I do strongly value the drip torch as an essential tool. Propane torches and Zippo lighters can certainly start a fire, but they are not efficient at stringing the fire along in a solid, continuous line, which is really what you need when backburning. For a fuel mix, use approximately 1/3 gasoline, 2/3 diesel fuel. If you’re going to do more than a single prescribed burn, invest in a drip torch. You can get them for under $150 from Ben Meadows or Forestry Suppliers online.
One of the greatest tools in prescribed burning has got to be the gas-powered leaf blower. These are fantastic for cleaning up firebreaks, and they also work great for extinguishing slow-creeping fires on the flanks and headfire sides of the burn.
ATV’s are pretty common, and I would consider them an essential tool for any medium-sized or large burning operation. For one thing, they allow you to race around the borders of the burn to quickly check up on people and make sure all fire lines are secure. Secondly, they can be of use to haul important things like fuel, hand tools, drinking water, and large water tanks.
Speaking of which, an ATV-mounted water system really is nice for peace of mind, especially on larger burns. Either use an electric or gas-powered pump and high volume hose & nozzle. For small jobs, a few manually-operated water backpacks are usually sufficient, especially if you’ve taken my advice to build good firebreaks. They too are purchasable from the online retailers.
Finally, it’s always a good idea to have some hand tools such as rakes or flat-nosed shovels on hand for your helpers. And decide whether you can just use cell phones for communication, or if you ought to have walkie-talkies. The latter are nice in that everyone can listen in and hear the communications, unlike one-on-one phone calls. Also, with hand radios you need not waste time unlocking your phone and dialing.
Conducting the Burn
Before lighting the fire, contact the county sheriff’s department via their non-emergency phone line and inform them that you’ll be conducting a prescribed grass fire. They’ll want to know your name, cell phone number, and the closest 911 address. Be sure to tell them NOT to send a fire department unless they speak to you first. (Sometimes, they still do). Also, it’s a good idea to go knock on all the nearby neighbors’ doors and let them know that you’re doing a controlled burn and not to call the fire department.
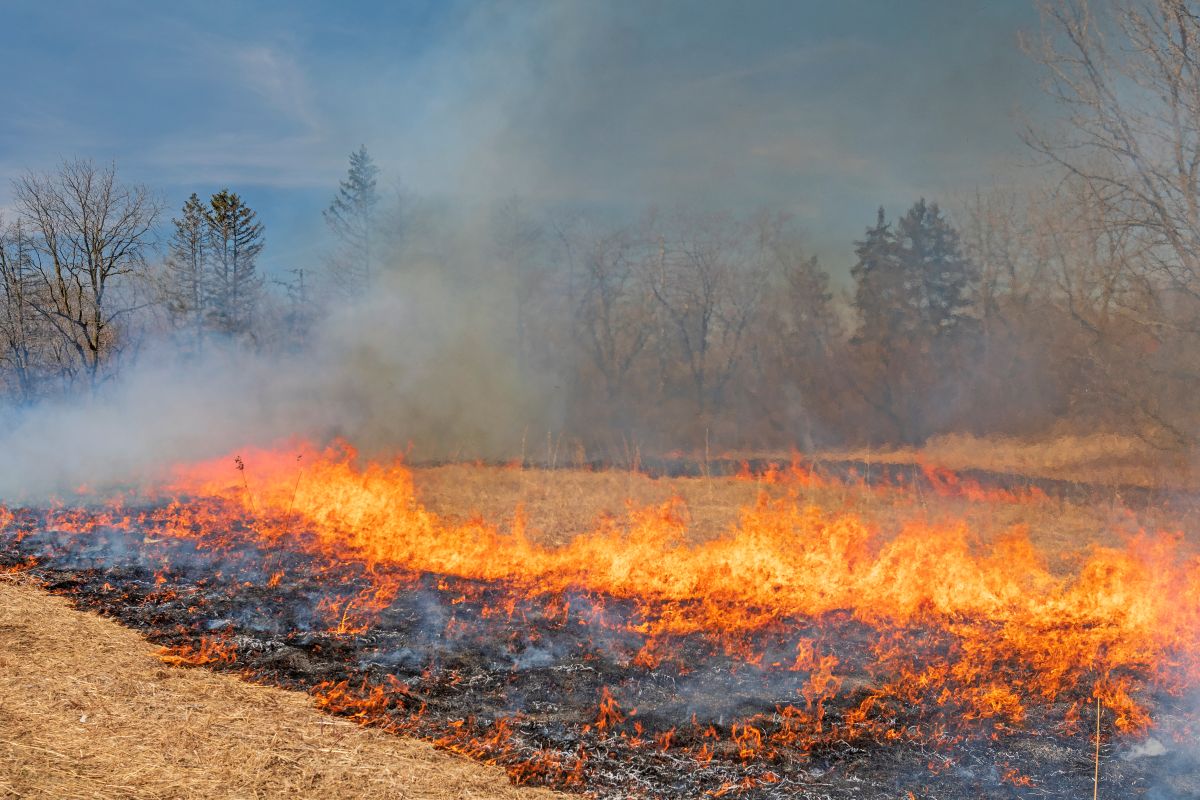
The basic ignition sequence of most prescribed burns is to begin from a solid anchor point on the downwind side, lighting a short strip of fire and allowing it to back up slowly into the wind (i.e., “backburning”). As the fire backs up and creates a safe amount of blackened ground 5-10 yards wide, continue down the line by lighting another short strip. Be sure the firebreak is holding and the fire is not breaching across before continuing down the line. Also be sure that the fire line is continuous and there are no gaps where a headfire could race across later on.
If weather conditions are tough and your firebreaks aren’t holding, then wet lining can be an effective strategy for completing the backburn. This entails applying water in a narrow strip along the firebreak, and then dropping fire directly adjacent to and on the inside of the wetline. The damp wetline should create a barrier and hopefully prevent the fire from breaching the firebreak. It can help to drive an ATV or truck wheel along the wetline to compress the vegetation & soil which helps it retain moisture and not dry out so fast.
When you have successfully completed the backburn, you can work upwind along either side of the burn unit lighting “flanking fires.” Here, the fire will slowly work its way into the fuel as the wind is blowing parallel to your line.
With the area blackened on three sides and the fire safely contained within the firebreaks, the final step is to light the headfire on the upwind side. Double-check to make sure everyone is in a safe place before doing this, and then stand back and watch it go!
Follow-up
Always make a trip around the perimeters to make sure all fires are out and nothing has escaped. When you can see neither smoke nor flames, call the sheriff’s department back to let them know you are all done.
With the fire completely out, you’ll now be able to relax and enjoy the scene: look up, and you’re liable to see hawks and vultures soaring overhead, attracted from miles away by the smoke which rings like a dinner bell in their minds, in search of an easy meal.
Looking out into the smoldering and blackened burnscape, you’ll see piles of smoking duff and scorched trees, thousands of little cottonwoods, cherries, and elms, the skeletons of uninvited guests in the prairie ecosystem. Soon, spring rains will fall and clean up this ugly scene, driving little green sprouts from the earth and carpeting the ground with fresh and succulent regeneration.
As for your friends and family who helped out, they’ll gather around and slap one another on the back, grateful for a good day’s work in the outdoors. Which reminds me about one more critical piece of equipment that I forgot to mention-a good-quality cooler, loaded with ice and beverages!
May 2024
By Joe Herring
For Leading News in the Dairy and Cattle Industry Check out the Links below: