Knots for Fly Anglers
Knots for Fly Anglers
By Rod Woten
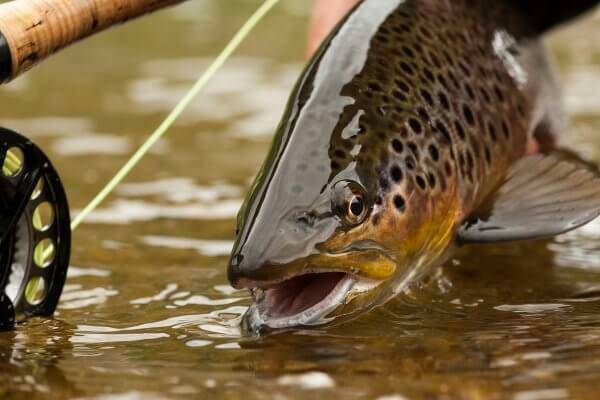
Anglers love their knots. I think the only other group that displays more affinity towards knots would be The Boy Scouts. Fortunately, for most recreational freshwater anglers, a couple good knots are really all you need to know. That being said, almost everyone has their favorite method for tying a lure to their line, and taking the stance that your favorite knot is better than your buddy’s favorite knot can often result in a raised voice debate over the matter. Fly anglers don’t have it quite as easy, however. A fly fishing setup consists of a reel which is connected to backing which is connected to fly line which is connected to a leader that is connected to a tippet that ultimately connects to a fly. That’s at least FIVE knots to get the job done! To complicate matters, each union has special requirements between varying thicknesses that each requires a specific knot, so a one-size-fits-all knot simply isn’t feasible. For beginning fly anglers, this can often be confusing. I know it was for me when I first started out. To that end, here is a simple straight-forward primer on the knots you need to know for fly fishing; starting from the reel and working our way forward to the fly.
Arbor Knot
This is the knot that secures your backing to the spool of your fly reel. Anyone that has spooled their own spinning reel or baitcaster probably already knows this knot. Fortunately, the knot is tied exactly the same as for a fly reel as it is for any other reel. I do add my own twist to it, and I find it really helps with preventing the backing spinning around the spool of a fly setup and is also great for preventing the same with super-lines on spinning and baitcasting setups. To tie this knot, the first thing I do is tie a double overhand knot less than an inch from the end of the backing. You want this knot to be fairly large because it will serve as the stop as the loop is tightened around the spool. Here’s where my twist comes into play…I wrap the backing around the spool 2 or 3 times, instead of the single pass that most folks usually use. I then take the end of the backing that I tied the double overhand knot in and make a simple overhand knot around the standing segment of backing (the part that goes back towards the spool your backing comes on). Then you simply pull the standing end tight. The overhand knot tied around the standing end of the backing will tighten until it hits the knot tied into the end of the backing and it will slide along the spool until the wraps around the spool are tight. Your fly line backing is now secured to your reel!
Nail Knot
This is the knot that you use to secure the backing to the butt end of your fly line, and is probably one of the toughest knots in all of fly fishing to tie. It requires, at the very least, a nail, needle or piece of wire, but is tied most easily with a small round tube or one of the many tying aids available commercially today. To tie this knot lay your tube against the butt of the fly line and then run the end of your leader along the tube, extending past the tube by 10 to 12 inches. Pinch all 3 together and begin wrapping that extra length back towards the butt end of the fly line, encircling fly line, tube and backing as you go. Wrap about 8 times and then push the tag end back through the tube or the space made by your nail, needle or wire. Slowly slide the tube (nail, needle, wire) out of the knot away from the butt end of the fly line. Pull on the tag end to tighten the knot then pull on fly line and backing to seat the knot onto the fly line. Trim the tag end of your backing and your fly line and you now have a strong, low-profile knot that will flow through the eyelets on your rod with very little resistance.
The nail knot is also the knot used to secure a leader to the forward end of your fly line. This means that if you like to change out your leader frequently to keep pace with the size of your fly as you change them throughout the day, you will be tying a lot of nail knots. Many newer fly lines have a loop welded into the end now to facilitate quicker leader changes, but even if your line doesn’t have a loop, there is a way to add your own. Simply take a ten inch piece of 20 or 30 pound monofilament and attach it to the forward end of your fly line with another nail knot. That’s half the story, and for the second half we’re going to need a new knot called the perfection loop.
Perfection Loop
The perfection loop is the knot we will tie into the other end of our 20 pound monofilament line already attached to the fly line with a nail knot. We will then tie a second perfection loop into the butt end of our leader and by joining and unjoining the two loops we will have a quick and easy way to change leaders as necessary. To tie this knot, form a loop in the end of the line by passing the tag end behind the standing portion of the line. Pinch that loop between your thumb and forefinger and pass the tag end around the standing portion of the line to form a second loop. Add that loop to your pinch hold and wrap the tag end around the standing portion one last time, this time going between the first loop and the second loop. Now with your other thumb and forefinger reach through the backside of the first loop and pull the second loop through it, ensuring that the third wrap stays between the two loops the whole time. I like to stick the tip of my forceps through the resulting loop and tug on the standing line to tighten the loop. This loop should not slip, and when tied properly the tag end will stick out directly to the left of the loop. Trim this tag end and connect your leader to your fly line by joining the loops
Surgeon’s Knot
All leaders come with a certain length of tippet built into it. As you change flies, or lose flies, the tippet gets used up. When you get to the point that very little tippet is left on the fly line, rather than dispose of the shortened leader for a new one, we can add tippet from our tippet spools to the end of the leader with a surgeon’s knot. To form this knot, lay your tippet alongside your leader, with the standing portion of each going in opposite directions. Form a loop with both lines and pass the tag end of the leader and the entire length of the tippet through that loop; one time for a surgeon’s knot or two times for a double surgeon’s knot and pull the knot tight. Since this knot is often monofilament on monofilament or mono on fluorocarbon, it’s a good idea to moisten the knot with saliva before tightening it to prevent burning the line from friction as the knot cinches.
Palomar Knot
You’re almost ready to fly fish! All that’s left is to tie your fly to the tippet at the end of your leader. I use 2 knots interchangeably to do this, and they are the same two knots that many anglers use to tie standard lures to their lines. Typically, I prefer the Double Palomar knot because I feel it is slightly stronger and slips less. On flies where the eye is too small for the second pass-though that the double palomar requires, I will resort to the Improved Clinch Knot.
To tie the double palomar, pass the line through the eye of the fly and then loop it back and pass it back through the eye again. You should now have a loop on one side of the eye and the standing and tag ends on the other. Pass the loop around the standing and tag ends and tie a double overhand knot. Before cinching the knot tight, pass the fly through the loop you formed when you originally doubled the line back through the eye, moisten the knot and cinch tight.
Improved Clinch Knot
As I mentioned before, this is the knot I use for smaller flies with a hook eye that is too small to pass the tippet through as required by the Palomar. To start this knot, feed the line through the eye of the hook and double it over. Wind the tag end around the standing line about 7 times and then run the tag end through the gap at the base of the windings, just above the hook eye. Doing so will create a loop alongside the windings. Pass the tag end through this loop, moisten the knot and pull to tighten.
As you can see, from a knot standpoint, there is quite a bit more involved in spooling up a fly reel in comparison to standard tackle. As I mentioned earlier, the nail knot is probably the toughest of all to tie, but investing in one of the many nail knot tying aids on the market and following the directions that come with it, will make nail knots much easier to learn. With the number of pre-spooled fly reels on the market, many folks are intimidated by all that is involved. Like anything else practice makes perfect, so don’t be afraid to take the plunge and spool your own fly reel next time. It will greatly enhance your understanding if the interaction of backing, fly line, leader, tippet and fly. Who knows…you might even start to look forward to spooling a new fly setup as much as I do? Good luck!
