Fall Walleye Tips & Tricks
Fall Walleye Tips & Tricks
In this article, I will explore several proven live bait rig and bottom bouncer trolling tips and tricks that will help you catch more walleyes this year. While these tips are by no means comprehensive, I am hopeful that you will be able to gain some insight from these techniques that you can use on your next fishing outing.
Bottom Bouncer Tips
Running a bottom bouncer and ‘live bait’ rig is arguably one of the best and fastest ways to put walleyes in the boat. This outfit helps to present your offering down towards the bottom where walleyes roam and in a surprisingly weedless fashion to boot. I utilize bottom bouncers to catch walleyes from the season opener until fall. There are a few things to keep in mind when running these outfits in order to have your presentation optimized.
The One Ounce Tip
When selecting your bottom bouncer size/weight, it is important to match the target depth you plan on fishing. A great rule of thumb is to use 1 oz of bottom bouncer weight for every 10 feet of water depth, so a 2 oz bouncer for fishing in 20 feet of water. If you move shallower and are fishing 10-15 feet of water, go for a lighter bottom bouncer like a 1 to 1 1/2 oz version, and conversely, if you move out deeper, go with a heavier bouncer. You want to just be able to make contact with the bottom while fishing relatively vertically.
Keep in mind that this is only a rule of thumb, and other factors like boat speed and current can force you to use a heavier bouncer. I always have on board my boat 1, 1 ½, 2, and 3 ounce bottom bouncers so I can cover any situation I am likely to encounter.
The 45 Degree Tip
Many years ago, I was fortunate enough to spend some time on the boat with the late great Rick Olson from Mina, SD, out on Lake Oahe. He taught me a ton about bouncer fishing for walleyes when I was a young angler. One of the most critical principles he instilled in me was to let out just enough line to make bottom contact and maintain a 45-degree angle of line from the rod tip to where the line enters the water. Rick said, “You are fishing a bottom bouncer, NOT a bottom dragger”.
If the angle is too steep or vertical, you have likely not let out enough line and aren’t making contact with the bottom. Conversely, if the angle is too shallow or flat, you have let out too much line, and the bouncer is likely to lay over and drag on the bottom, risking a snag. Optimally, you want the wire portion of the bouncer below the weight to just be ‘ticking’ the bottom, with the bouncer standing up. This is a good double check to make sure you are using the correct weight bouncer, too (see previous rule).
Static Drop Tip
I never cast a bottom bouncer. Once I have achieved my desired trolling speed, I lay the bouncer rig in the water alongside the boat and double-check to make sure everything is running right. Then I open my bail and let the rig fall on a slack line until it hits the bottom. You can tell when the rig hits the bottom because the line stops paying off the reel, and often, you can feel it hit the bottom. When the rig hits the bottom, I immediately engage the reel to stop feeding line out.
The movement of the boat will pick up the little bit of slack line and stand the bouncer up, and you are fishing. Sometimes in current, wavy conditions or trolling with some speed, it can be difficult to notice when the bouncer hits the bottom. Line counter reels or metered/indexed line can help with this by verifying that you have let the correct amount of line out. A sharpie marker can help you to ‘index’ your line by putting a mark every 10’ on your mainline for about 50 feet starting at the bottom bouncer and going towards the reel.
Live Bait Tips
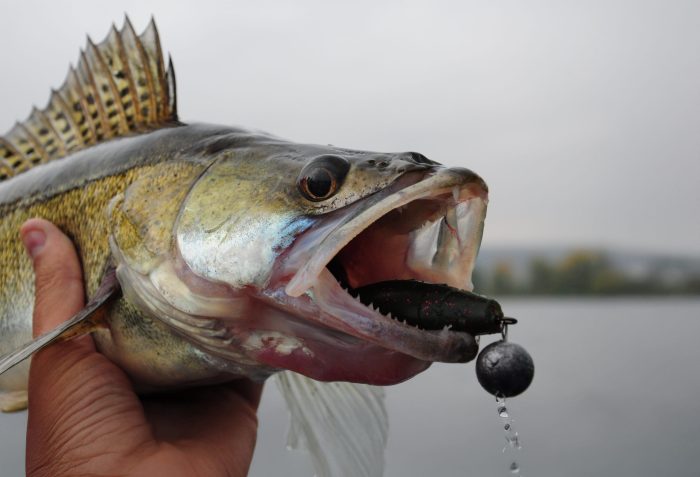
You will notice that I notated ‘live bait’ as there are lots of options here, and not all of them are living things. Nightcrawlers, leeches, and minnows, as well as some exotics like willow cats, waterdogs, and frogs, are all living things, but there are a ton of artificial options designed to effectively mimic their live counterparts. From scented soft baits to PVC and TPE plastic baits, these artificial baits are designed to look and act like living things. As a result, we will treat them in a similar fashion to their live counterparts with only a few special considerations.
“Match the Hatch” Bait Tips
When choosing what bait to use, I attempt to replicate what walleyes might be feeding on at that particular time. Here is my live bait program: Early in the spring, I use minnows and their replicants. From early May to Mid-June, I prefer leeches, and from Mid-June to early September, I use nightcrawlers and their artificial counterparts. In early to late fall, I will go back to minnows and chubs or similarly shaped soft bait imitations.
These time periods are very generalized and relative. Each live bait ‘season’ can overlap with another depending upon water temperature, fish location, and a variety of local factors. For example, where I live in Northwest Iowa, we experience lake fly hatches (predominantly midges and mayflies) starting in mid-May and continuing throughout the summer. In an effort to ‘match the hatch’, I may downsize my rig (smaller beads, blades, and hooks) as well as fish smaller live bait profiles like a medium-sized leech or half a crawler when presented with a bug hatch or cold front conditions. Conversely, I may also choose to upsize my bait offering and use a chub or large creature bait to imitate what is also feeding on the bug hatch in an attempt to present an easy meal to a hungry leviathan.
Live Bait Rig Hook Tips
When choosing which live bait rig to clip onto the bottom bouncer, one must consider the bait used. Proper hook size and number are dictated by the size and type of bait used. For example, if I am using a whole night crawler, I am opting for a two or even three-hook crawler harness. This is an effort to minimize short strikes and/or predation by smaller fish when using a whole crawler. Conversely, I will use a single hook for partial crawlers, minnows, and leeches. In the case of larger soft plastics and chubs, I will use a larger main hook and a smaller ‘stinger’ hook for the rig.
I predominantly use Size 2 to 6 VMC octopus hooks for my rigs, but have been very impressed by slow death hooks when fishing nightcrawlers. The slow death hook, when tipped with a crawler or its artificial equivalent, causes the bait to spin in a wide ellipse. This action can be deadly for hungry walleyes. Since slow death rigs and spinner rigs in general can cause significant line twist, I always use a quality swivel between the rig and the arm of the bottom bouncer.
Live Bait Rig Accessories Tips
As far as accessories like beads, blades, and floats, the sky is the limit. All add bulk, flash, and buoyancy to your rig, but when to use each can be complicated. I like using a clevis so I can alternate between different sizes, types, and colors of blades easily. Generally, I will use a #3 or #4 Colorado blade and five beads ahead of a hook for most of my offerings when trolling in the .5 mph to 2 mph range. I will use a larger #5 Colorado blade if I am fishing a larger bait, fishing dirty water, or need more lift. I will opt for a willow-leaf or Indiana-style blade if I need to be trolling faster (over 1.75 mph).
If fish are spinner shy or I need to fish very slow, I will skip the blade and opt for an inline float ahead of the hook for buoyancy or use a ‘smile blade’ like smile blades or butterfly blades. I get asked constantly about my favorite color of blades, and I have to admit that sometimes color can make a big difference. That’s why I use the clevis and have a variety of blade options on board so that I can experiment. However, if I had to pick an all-time favorite blade color, it would be gold, and more specifically, hammered gold.
Live Bait Rig Line Choice Tips
I typically use an abrasion resistant monofilament line like 10-14 lb test as opposed to fluorocarbon or superlines. Monofilament floats where the other two line types are neutrally buoyant or sinking. I want the bait to be off the bottom, so mono is my choice. Another tip for if you are experiencing line twist, use a heavier line for the snell. An additional benefit of fishing with a monofilament snell is that there is some stretch to it, so it can act as a bit of a shock absorber for hard strikes. As for snell length, I typically go with a 5-foot snell. I will shorten my snell down to as short as 1 to 2 feet if I want the hook to be a little higher in the case of leaves, weeds, and/or rocks on the bottom.
Experimentation is the best way to dial in your walleye bite. The tips and tricks in this article are a starting point for you and are what have worked for me for decades. I have learned a lot on my own through trial and error. I have also been very blessed to know some truly outstanding anglers in my time who kindly taught me some of their methods. Best wishes and BIG fishes.