Your New Puppy Pt. 4: Starting our Gundog
Your New Puppy Pt. 4: Starting our Gundog
Finally, we have reached part 4 of our mini-series covering how to bring our puppy home, what to focus on, and how to progress in our training program. At this point we are ready to introduce the electronic collar, begin introductory field work and conditioning our dogs to gunfire. After this stage, we can consider our dogs ready to experience hunt-like conditions. Keep in mind that just because a dog is ready for this does not mean that they will go out in the field and perform like a seasoned dog. Have realistic expectations that your young dog will make mistakes and have “growing pains” in the field. The number one thing here is that we maintain a high standard when it comes to little things like obedience in the field, and set our dogs up for success by being mindful of their age and stage in training.
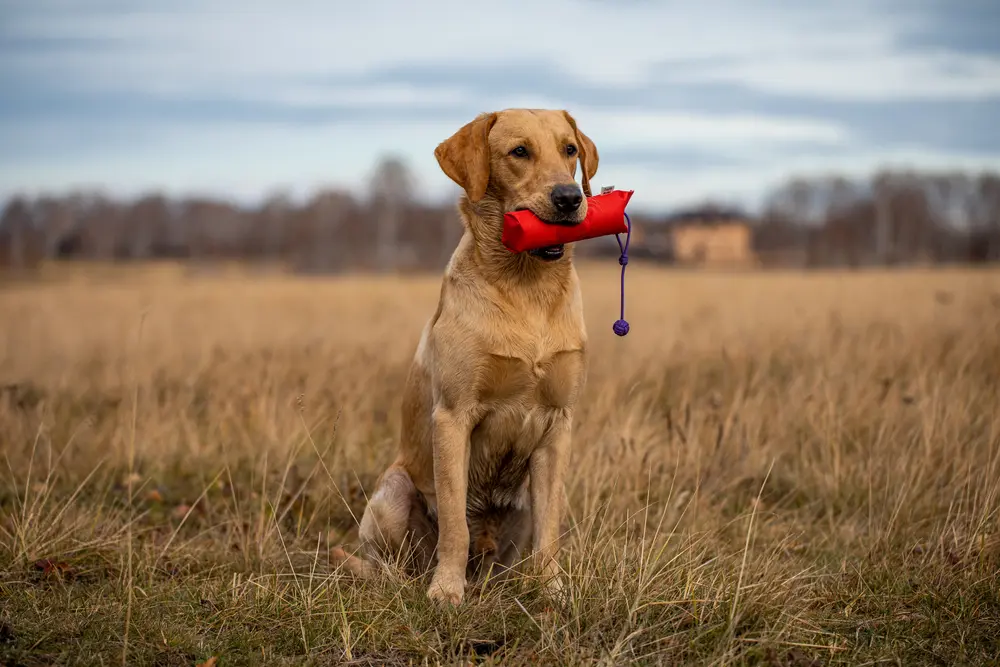
One of the biggest mistakes we can make in our dogs first hunts is to put them in the field with several dogs and hunters. Do not overstimulate your dog; rather, take them out by yourself or with another hunter. The focus is to let the dog learn to do their job, with minimal distractions at first. A six-gun volley when a pheasant goes up can be too much for a green dog in their first hunt(s)!
The E-Collar
The e-collar is an important tool in training a dog. Notice I said the word “tool”. The electronic collar is a tool used to reinforce commands that a dog should already know, meaning we have already taught the dog the behavior and can use the e-collar to progress that behavior. Based on our mini-series progression in the last three articles, obedience is the logical place to introduce our dogs to the electronic collar. We have already taught our dog basic obedience. Starting from early puppy stages such as sitting before they are given their food, to on-lead work with a choke chain.
When I introduce the electronic collar I prefer to do it during on-lead obedience work. Our dogs have already learned obedience with a choke chain, and experienced corrections (pressure) from the choke chain to reinforce the commands HERE, HEEL and SIT. The fact that the dog has already experienced the choke chain is a big deal; they know what the pressure/correction from that choke chain means. All we are going to do now is incorporate the e-collar on a low setting and add it to the sequence.
You are already walking the dog on lead and using the choke chain to reinforce your basic commands. Now, after you have quickly used the choke chain (for example on the command SIT) you will “nick” the dog on a low setting on the e-collar as well. The sequence would be a verbal command of SIT, while you snap the choke chain, then “nick” the dog with the e-collar and repeat SIT. This happens fairly quickly, but the familiarity of the lead, choke chain and verbal commands allow you to lightly introduce the collar in an isolated and safe way.
Notice that I said to have the collar on a light setting; if your collar has setting 1-12, then 1 and 2 would be the lightest settings. It is always easier and safer to work up the settings as needed rather than start too strong and give the dog reason to be scared of the e-collar. Some dogs will respond to light settings, some won’t as they all have different thresholds. The idea is to replace the choke chain with the electronic collar, which is why we are using choke chain corrections AND e-collar corrections at the same time. This also makes the transition from on-lead to off-lead simpler!
From there, you can work on off-lead obedience, remote sit and all the drills covered in the previous article. The idea is that once you’ve worked through this, your dog responds to commands off lead and with an e-collar, very consistent with conditions in the hunting field.
Birds, Cover and Quartering
Before we discuss introductory drills for the field, I want to be clear that even though we have introduced our dog to the e-collar we do not want to use the e-collar anytime our dog is on birds or scented dummies. The last thing you want is to have your dog associate a bird, or bird scent with the e-collar (at least at this stage of training). Your dog can wear the collar, and you can use the collar to reinforce basic obedience as needed, but never when the dog is on a bird or bird scent!
Whether you are training a pointer or flusher, you have certainly introduced your dog to birds before this point (clip wing pigeons for example, or dead bird and wings). The difference now is that we are going to begin allowing our dogs to discover birds in cover. For pointing dog trainers, depending on the program you are following you may want to use orange tape to mark where you plant the birds to identify when your dog smells the bird. Of course, unlike flushers, you never want to let pointers catch or trap birds, as it is counterproductive in training a dog to point. There are several great pointing dog training videos and books out there for more information.
For flushers, I like to start by using clip wing pigeons or quail (smaller birds are easier for young dogs to manage, and less likely to spook them). Just place a few out in the cover and let your dog out. You can use a check chord if you’d like (I always do to instill a closer working range as well as establish some control if a road is nearby). Let the dog run around and have fun. You can encourage them to come to you or work towards a certain area, but ultimately we want them to find the birds on their own. This will develop confidence, as well as encourage them to start using their nose and start seeking birds.
It is also a great idea to use dead birds (you can freeze training birds in the freezer, but make sure to thaw them out before using). Additionally, you can keep your training bumpers in a bag or bucket with your training birds to get the scent on them. Dead birds and dummies are excellent because they don’t move, and for flushing dogs they learn to smell it, and go right in and grab it. This will lead to developing a strong, confident flush.
This drill will progress over time. You will notice your dog begin to quarter and search on their own, whereas in the beginning they may just stumble onto a bird. Use this opportunity not to just learn to find birds and quarter, but also to work on obedience (HERE, HEEL and SIT) during the drill. You will also want to incorporate your whistle commands for calling the dog to you. Work into the wind, and give your dog the best chances to succeed.
Gunfire
As discussed previously, our dogs were introduced to birds at an early age (12-14 weeks of age). During that time, if the dog was crazy for the bird we could introduce gunfire at a distance using 209 primer pistols. Essentially we will continue that concept as our dogs are searching for birds in cover. The difference is that this time, we will be doing this in closer proximity to the dog, and can gradually progress from primer pistols, to a higher gauge shotgun. In most cases, dogs that enthusiastically pursue birds will not be distracted in a negative way by gunfire. It is critical that you read your dog. Any sign of discomfort or apprehension calls for immediately stopping with gunfire, or possibly going back to a primer pistol at a greater distance. Try to make the gunfire correlate to a fun task, such as finding birds.
With dogs that continue to search for birds enthusiastically, and show no signs of the gunfire bothering them you will quickly progress to shooting pigeons or quail over your dog. Do not be in a hurry to do this. There are plenty of pieces that may need to be done before we are shooting several birds over our dogs such as retrieving skills (force fetch for example) or simply coming back to the handler with the bird. This can be worked on with a check chord. Gun introduction is critical, and needs to be done gradually and in a controlled environment. Mistakes are hard to recover from! Again, start with primer pistols at a distance, have a friend help by shooting when the dog is chasing a clip wing bird. Gradually work closer and read your dog.
Once you are through these stages you can begin to put your dog on birds and begin your hunting adventures with your new pup! These first 5 or 6 months fly by, and if you take the proper steps along the way it is the difference between a great hunting dog and a dog that never reaches his or her potential. It is all about conditioning, socialization and attention to basics. If you have questions please contact us at info@uplandgundog.com!
September 2021
By Ryan Eder