2 DIY Taxidermy Projects
2 Do-It-Yourself Taxidermy Projects to Display Your Trophy
When it comes to preserving the memory of time out in the timber we often turn to taxidermy to help us preserve the animal as well as the memory. I love walking into a shop or business and looking at different mounts on the wall. Each one holds a story, and you can bet the owner of the mount is willing to reminisce on the memory and is eager to swap stories from your own experiences too.
Taxidermy, along with everything else, has increased in price. You may think your taxidermist is increasing prices to gain a little more profit, however this is not necessarily the case. One taxidermy shop shared that the cost of materials for taxidermists have doubled to almost quadrupled. Your taxidermist has to charge more to break even on your mount. With the rise in the cost, you might be considering other options to preserve your memory. Even with little to no experience, you can tackle a coupe DIY projects to save yourself some money and still have a trophy to display.
Tanning
About 10 years ago, I tanned my first hides, a couple of rabbits and a coyote that my boyfriend (now husband) shot. I had absolutely zero experience in tanning, fleshing, or preserving hides. However, my dad used to do some trapping and tanning. I sat down with him and got an overview of the process. I then talked to some other people, who I knew trapped and tanned, to get some more pointers before I began my quest.
The skinning process was the roughest part for me. When it came to skinning a lean coyote, the hide was tough to remove due to the low fat content. I am used to going fast, and caping deer roughly and quickly. When it came to skinning a coyote, I had to go slow and use a sharp knife, you might want an exacto knife for some delicate tissues. A co-worker shared a tip with me that helped a ton. Per his advice, I used a sports ball inflation needle on an air compressor. Around the ankle/hock area of the coyote, I inserted the needle and allowed air to flow under the hide. The air helped separate the hide from the body and made skinning a lot easier.
Salt is your friend and helps kill bacteria, which will cause the hair to “slip” and come off of the hide. Salt both sides of your hide liberally. Once salted, you can store the hides for some time, or get to work right away. I prefer to begin working promptly. First you will want to flesh the hide and remove all the fat and tissue off the hide. You will have the best results if you use a fleshing tool, similar to a draw knife. My first hides I fleshed on the ground or in my driveway, I didn’t have the right tools and it would have been easier if I did purchase them right away. My Dad later helped me build a fleshing table so I could work on hides at an elevated position. You can also buy fleshing boards to drape the hide over while you work to remove the tissues. On a deer hide I brain tanned; I wanted the hair off the hide so I was left with soft leather. To do this I soaked it in a lye solution which caused the hair to slip. In a couple of days, I was able to easily wipe the hair off the leather.
Once fleshed, you want to degrease the hide and let it dry. I recommend using some soapy water on the side you just fleshed and letting it hang to dry the hide. Once it is dry, yet pliable, the hide is ready for your tanning solution. I originally purchased a tanning kit from Van Dyke’s Taxidermy. This was based on a few recommendations from peers. Later on, I brain tanned a couple deer hides. An animal’s brain has enough chemicals to tan its hide completely. Once you apply your tanning solution or your brain serum to the hide, you want to let it begin to dry. As the hide dries, you will stretch and “break in” the hide. You will see the hide turn to a lighter color as you pull and break the filaments. It then will become pliable and softer. Keep working it until you get it as soft as you would like it. You now have a tanned hide to commemorate your hunt.
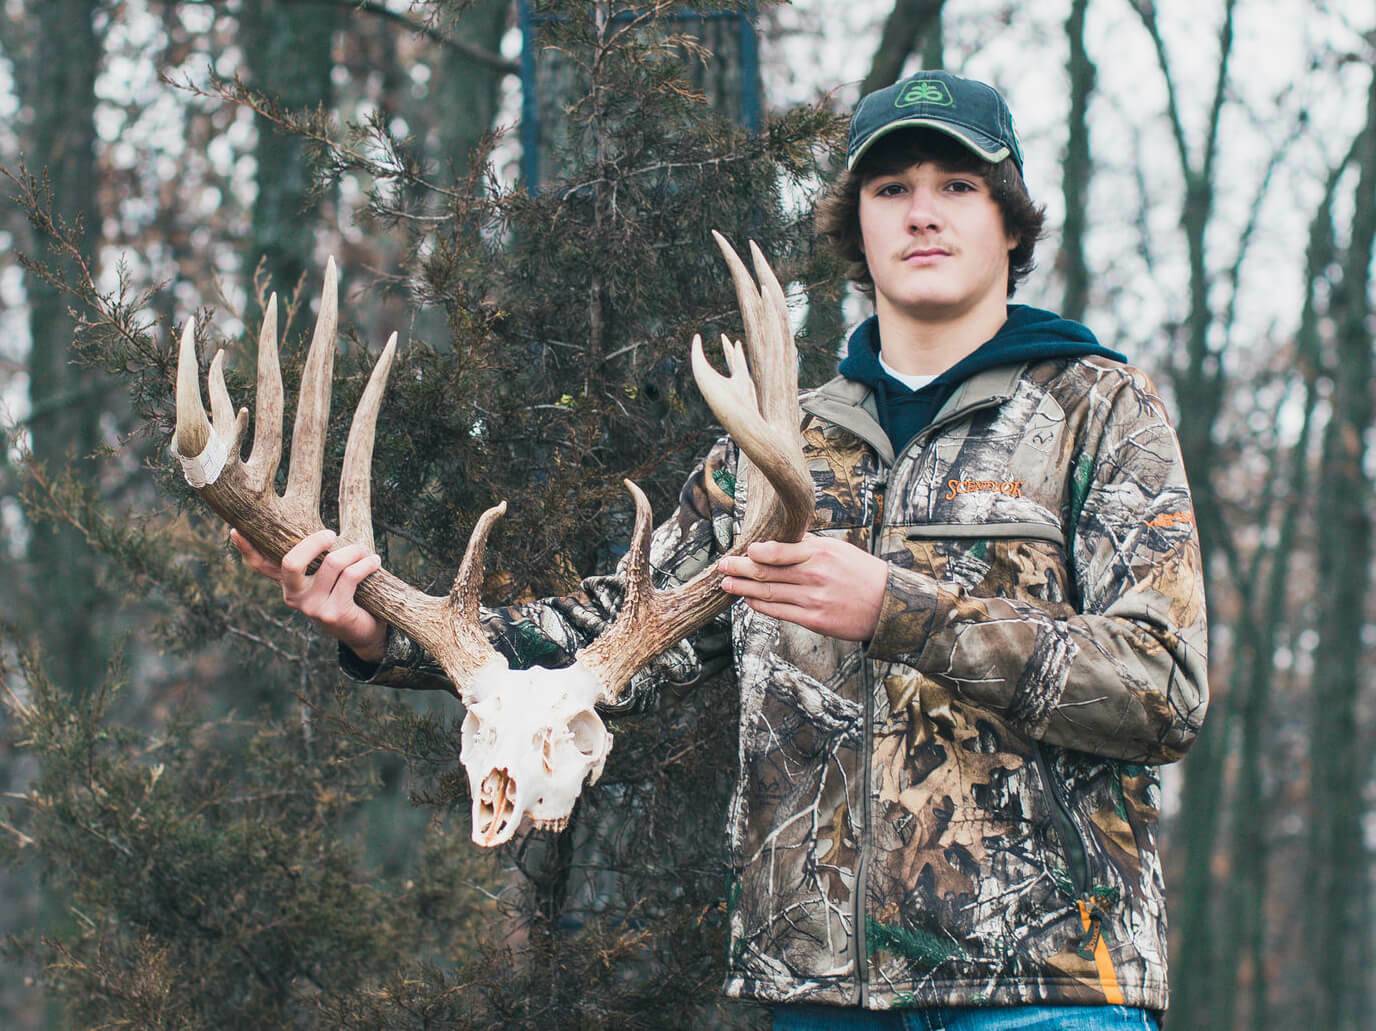
European Mounts
Another way to preserve your hunt is to use a European mount. If you are content with having only the skull and antlers to display, you should look into this option. This is a pretty easy process to perfect. There are several different ways to do this, but I am going to share how I do European mounts.
First, you want to remove the hide from the skull. I used to try and get every piece off, but then through trial and error, I learned that you don’t have to dull your knife working at the hide around the base of the antlers. As you boil the skull for a while, the remaining hide will slip right off. Once you have the hide removed from the skull, you want to simmer the skull in water If you boil it too hot, the nose bones will become soft and may try and separate from the skull. I’ve learned if you add about a cup of peroxide OR a cup of borax to the water, the time needed to boil decreases. Some people will wrap the antlers in plastic wrap and gorilla tape to keep the bases protected from changing color with peroxide. If you add peroxide to the water for more than 3 hours, I would recommend wrapping the antlers to prevent discoloring the bases.
From here, you will simmer the skull for about 8 to 10 hours. I take the skull out of the water and shake it to dislodge the meat and soft tissues. Some people will powerwash the skull to help clean it. Just be careful around the nose cavity so you do not break the delicate bones. Do not forget to remove the brain from the skull. You do not want to leave it in there, it will decay and begin to smell bad. When your skull is getting close to being clean, change the water and add clean water and add peroxide. Now you will boil it for about one to two hours. This last step brightens up the skull to a pretty white. Once it is done, I recommend degreasing the skull with some soapy water. You do not have to use peroxide if you do not want to. The very first time I undertook this project, I painted the skull bright white with spray paint to whiten the skull. I didn’t use peroxide this first time. Once you are done boiling or painting, the skull is now ready to display. We have a couple of skull hangers that hold some of our best deer on display at our house.
Celebrating a hunt does not have to be expensive. With a little bit of time and some work, you can take on a couple of projects to help you remember your time in the outdoors. I completed both the tanning and the boiling of the deer head without prior knowledge or experience. You too can do a little research and tackle these projects too. These two do-it-yourself projects still leave you with a physical trophy to display and share with other outdoorsmen.
By Jessica Graham
February 2023